Tools for Testing Web Accessibility

You want your website’s content accessible and useful to everyone.
But how do you know if it is, or if there are issues that need fixing? The answer is testing. Even the most expensive and well-cared for websites can fail to meet the recommended standards of accessibility. The key is understanding what needs fixing and keeping up with updates.

While testing can and should involve a combination of both machines and humans, for the purpose of this article let’s just focus on the machine side of things.
This means relying on a piece of software to conduct testing on an existing website, running your code against a set of accepted accessibility standards. By standards, we’re generally talking about WCAG 2.1, the internationally accepted guidelines for web accessibility as defined by the W3C.
There are many ‘automated’ tools you can consider, some paid and some free. They typically don’t require much technical knowledge to run and offer an easy entry point towards accessibility testing for everyone.
Here’s how they work. These tools start by crawling a specific webpage, or an entire site. You simply need to enter your page URL, or trigger the plugin while viewing a page in your browser and run the test.
Coded scripts compare your site’s underlying code against a defined set of accessibility standards, noting when and where you may be in violation of these rules. The tool then produces a report, highlighting any violations and listing the actions required to achieve accessibility compliance.
All of these tools are relatively easy to understand and use. They not only highlight areas that need attention, but also offer a more detailed description of each violation, explain why it’s an accessibility issue and offer additional links to get more information.
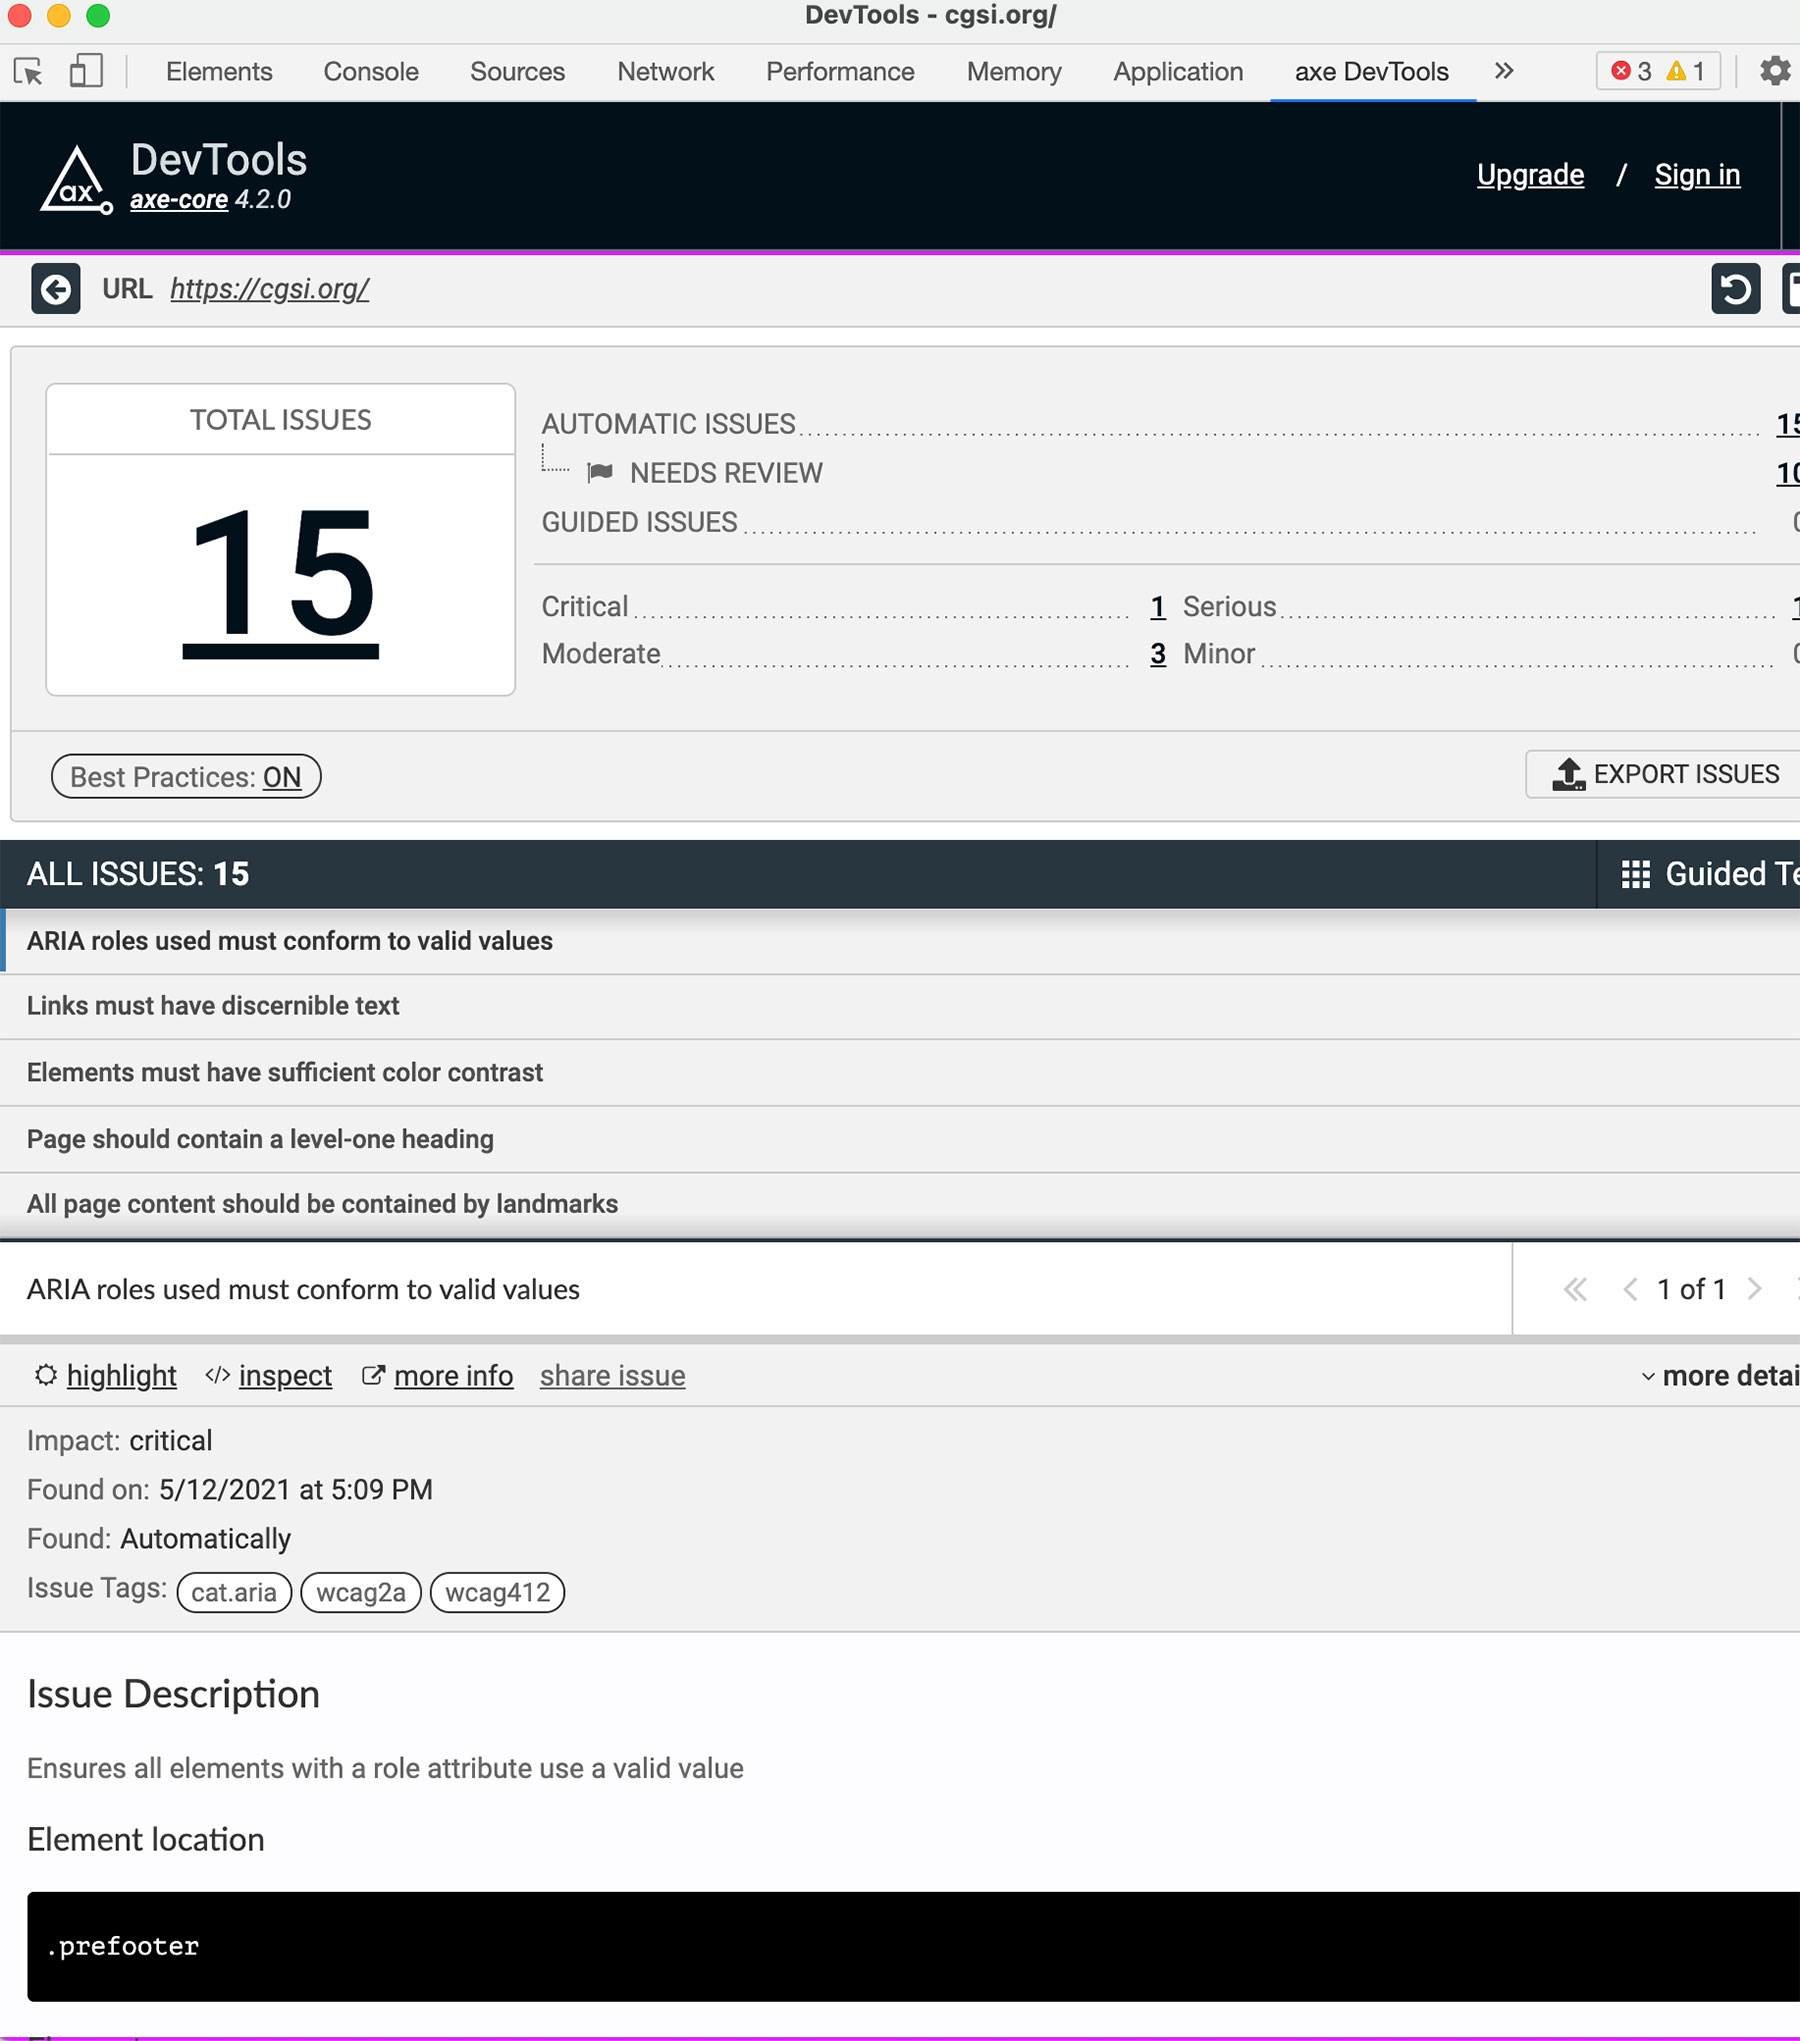
First appearing as an open-source option in 2015, the aXe plugin is another popular option for conducting tests, and a standard part of our own toolkit. Unlike WAVE, the aXe plugin doesn’t run in a separate browser window. To run an accessibility test through aXe, a user needs to use the “web inspector.”
First install the plugin in your browser of choice. While in a browser such as Chrome or Firefox, you can ‘control-click’ on the page to reveal an option for the “Inspector.” If you’re not familiar, this is a common tool used by web developers to inspect the underlying code of a site when writing CSS rules for theming or testing their JavaScript code for runtime errors. You can learn more about it elsewhere.
After installing the aXe plugin, a new option will be available in the Inspector just for “axe DevTools.” Selecting it will bring up axe DevTools, with the option to scan your page for accessibility compliance. Similar to the WAVE tool, aXe will list any and all issues of concern in a nice user-interface, tagging issues it finds “critical” or “moderate” and explaining both the exact issue and how to resolve it.
Unlike WAVE, aXE does not generate a visual page overlay, but it does offer links to take you directly to the issue on the page ("highlight") or directly to the issue in the code ("inspect"). It is more geared towards the web developer or someone comfortable using the code-based Inspector as their primary tool.
Like WAVE, this tool also underwent a recent visual upgrade, and presents a nice interface for the end user. The makers of the aXe plugin, Deque, are a private company. In addition to the free tool, they offer more expanded paid tools and accessibility consulting through their website.
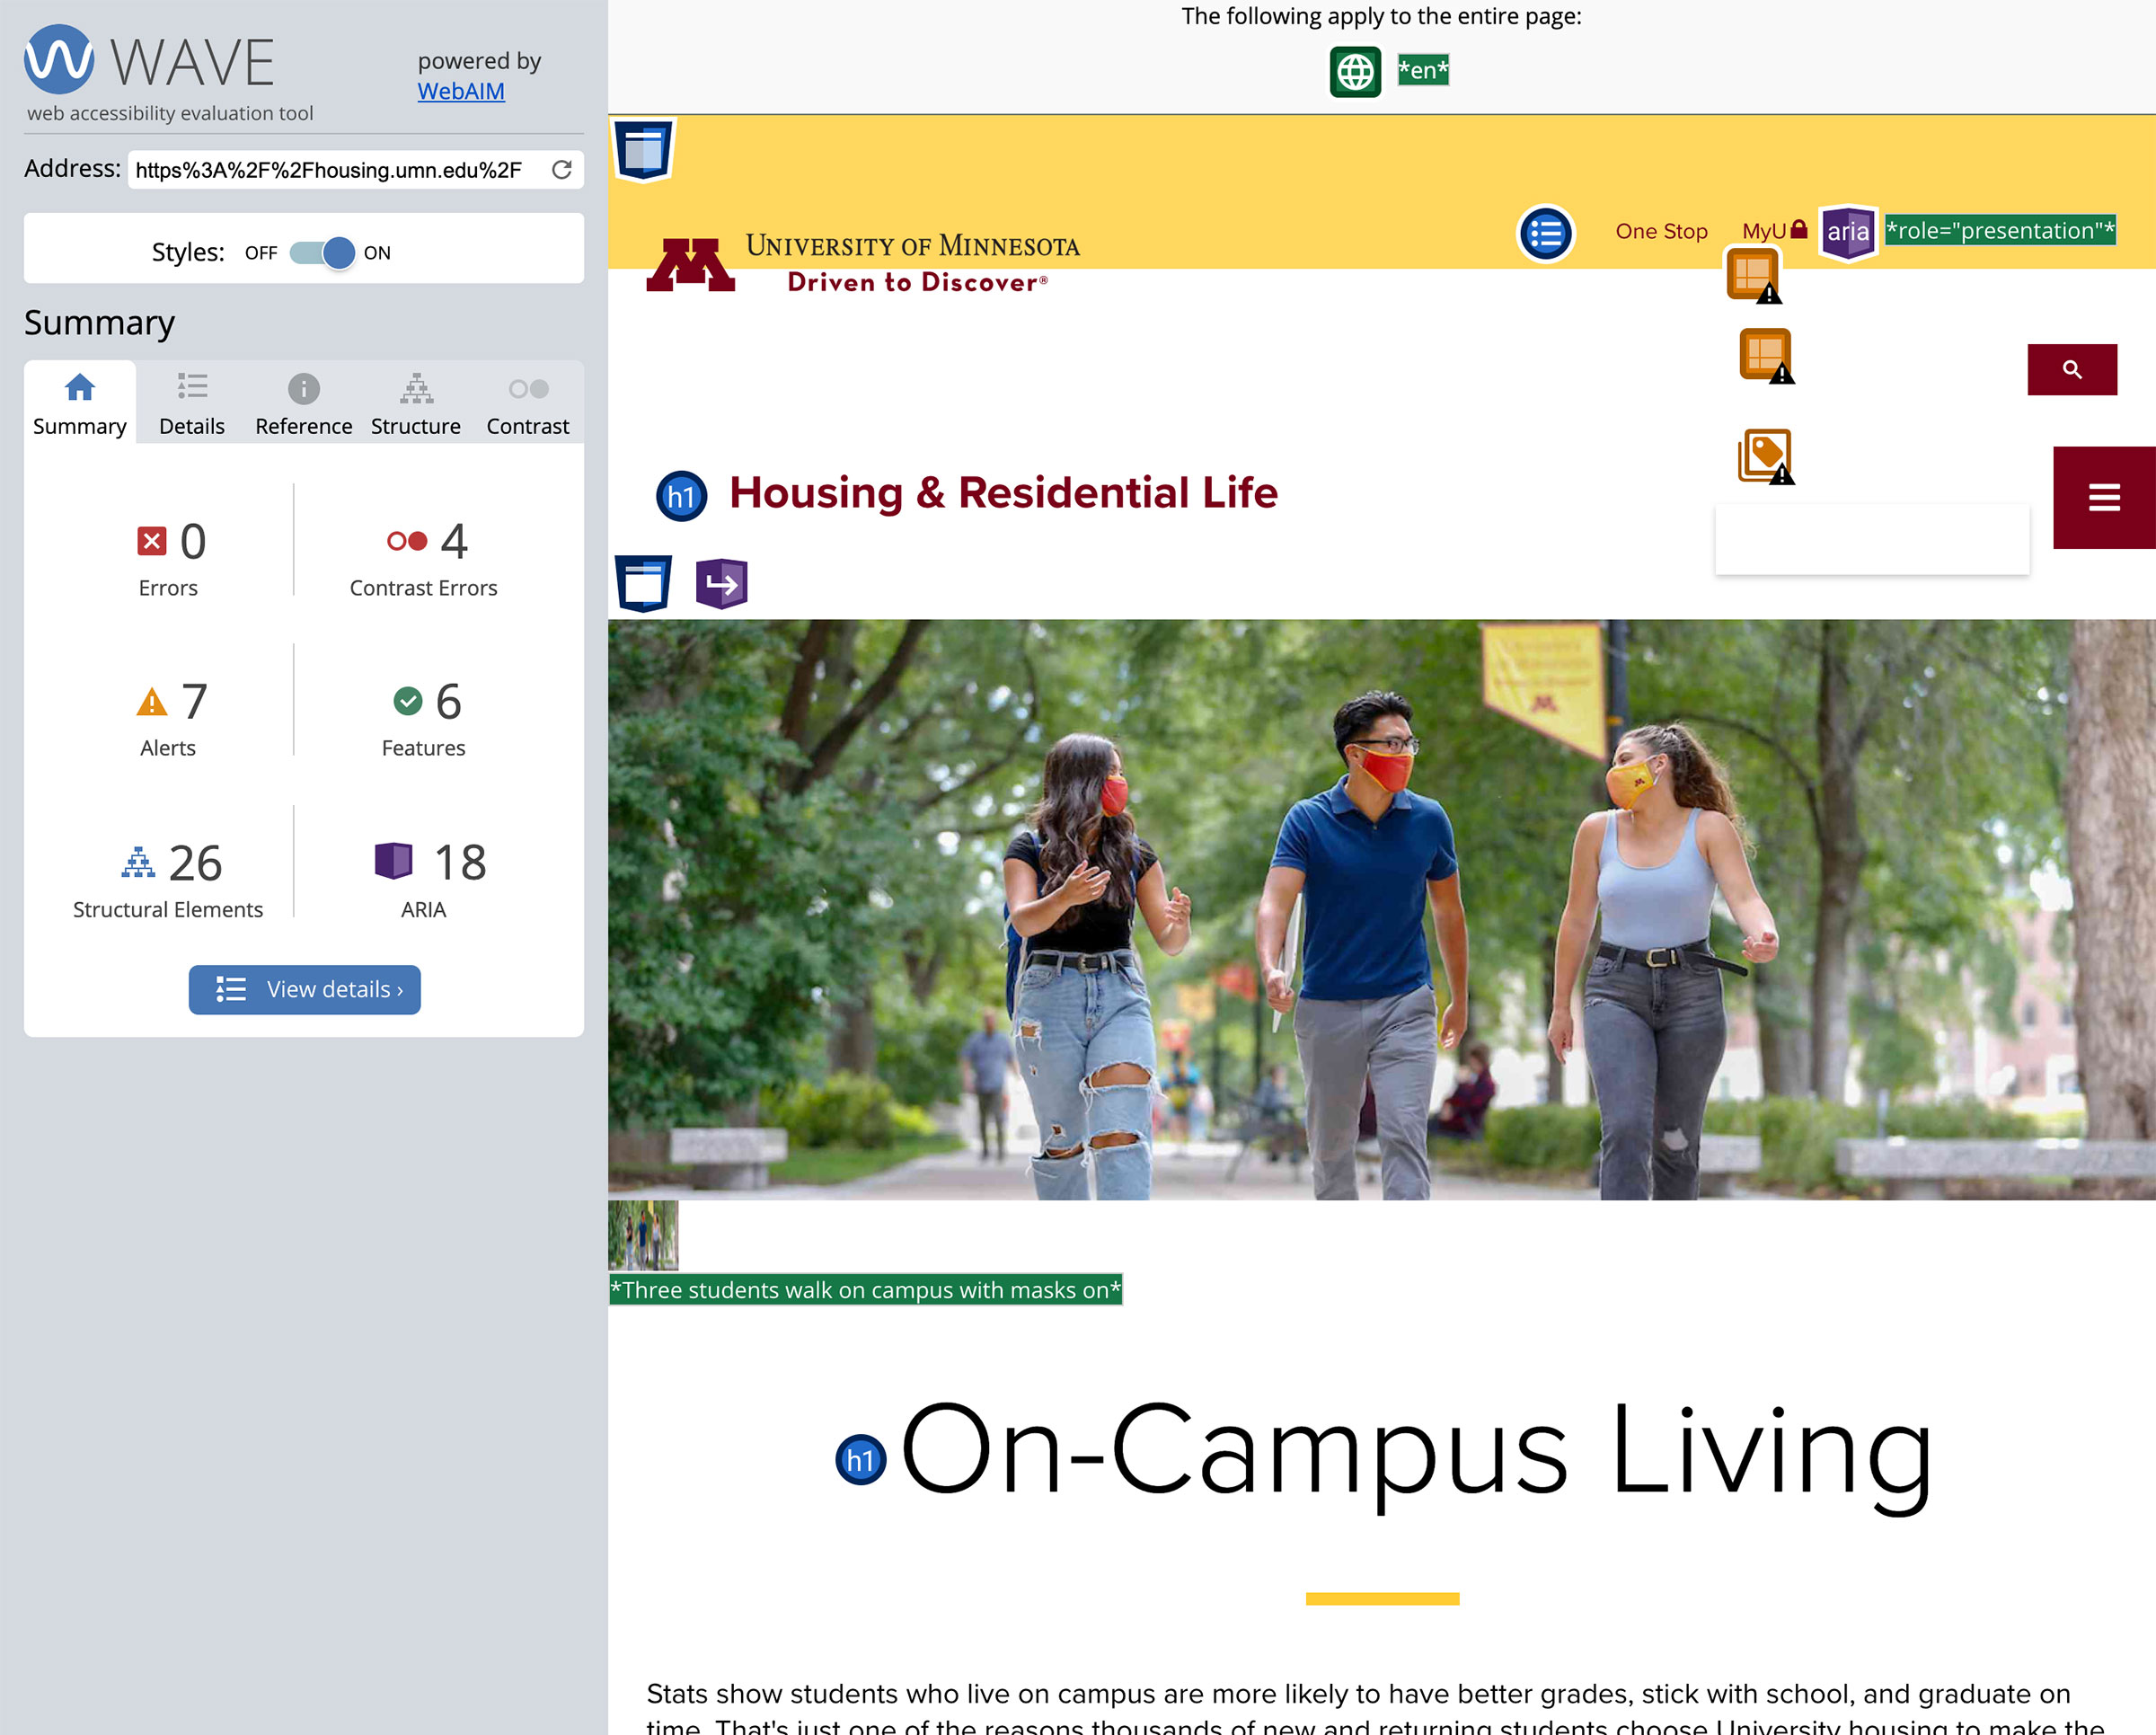
One of the best examples of a free accessibility tester is the WAVE tool.
This online accessibility checker has been part of our regular testing for years. The WAVE tool (“Web Accessibility Evaluation Tool”) is powered by the nonprofit organization WebAIM, who have been providing online accessibility resources since 1999. Recent improvements to WAVE have made it even more user-friendly and easier to use than ever.
Users can either go to the dedicated site for WAVE testing and enter a specific page URL, or install a plugin in your browser and trigger a WAVE test as you are browsing. Doing so brings up a results screen, featuring your webpage overlaid with a variety of markers, and a sidebar detailing the results. Within the results, you can see what needs correction. Simply make your edits and run the test again to see if you’ve resolved the issues.
Running the test itself is fairly easy. But understanding the results can be tricky. The results page (by default) can return dozens of different colored flags and lines of feedback. This can easily feel overwhelming.
One of the first things I suggest is to turn off some of the testing options to make it easier to focus on the violations. That means turning off the “Features”, “Structural Elements,” and “ARIA” highlights. All of these are useful and important options to note when determining accessibility, but it’s much easier to focus on violations (“errors”) and warnings (“alerts”) without the additional visual noise.
Another option in WAVE is to toggle your page styles "off." While this can feel disorienting to see your webpage without styles, it has the advantage of removing visual distractions and focusing your attention solely on the accessibility issues. CSS styles can obscure or hide them otherwise.
WAVE does the work of highlighting the part of your page where it sees a potential issue so you can note it and make corrections. It will even offer the user an option to click the “info” icon next to a violation, in order to learn more about that specific issue and what is needed to make your page accessible.
Beware False Flags
I say "potential" issues because machine-based testing isn’t always perfect. Take color contrast, for example, a common violation. Accessibility standards require an appropriate level of color contrast between your text content and whatever background color it is placed upon. You don’t want to place light grey text on a grey background, it’s too hard to read.
But sometimes there is no contrast issue. Perhaps the WAVE plug-in didn’t recognize how you set the background color of a page element. For example, a background color set on a pseudo-element like “:before” doesn’t show up in its test, resulting in a “false flag” when the contrast is actually fine (this is true for all machine-based testing tools I highlight, not just WAVE).
When that happens, it’s fine, better safe than sorry. But note that it would take someone knowledgeable in CSS to understand that there was no violation. So, while anyone could run these tests without a technical background in web design, it often does require an experienced web developer to know what to do about the results.
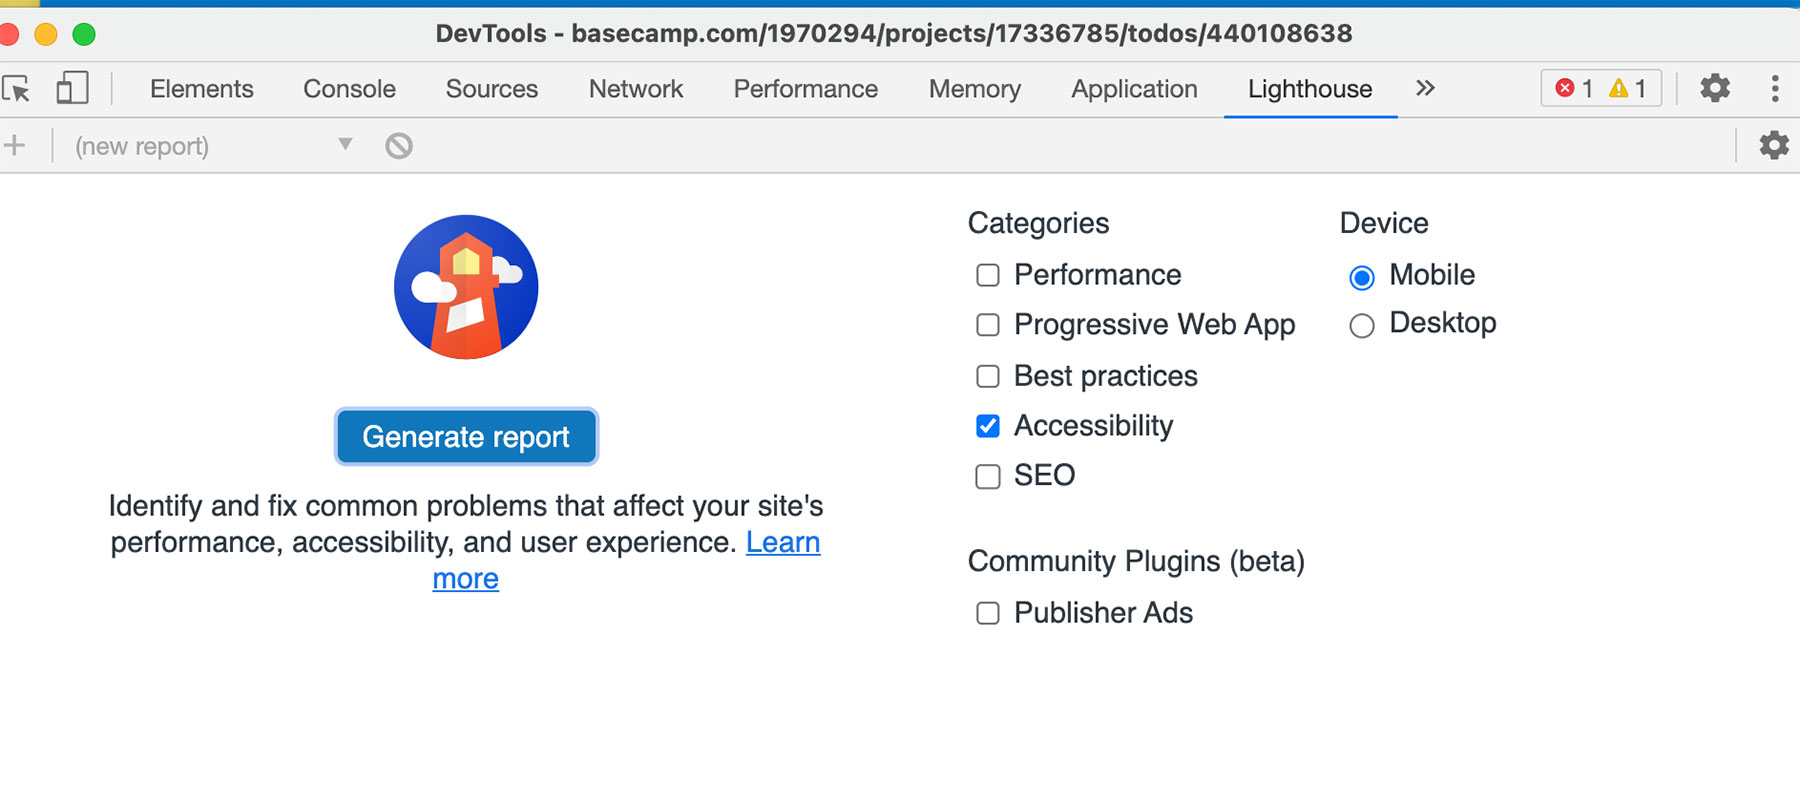
Browsers themselves also offer accessibility testing. In Chrome, anyone can use Google Lighthouse to conduct an automated test of a webpage. Similar to aXe, you initiate the test by loading a webpage, and then control-click (right-click) to bring up the “Inspector.” Within Inspector, you will see a list of options along the top of the window (Elements, Console, etc.). Look for “Lighthouse”.
Once you click and load Lighthouse, you have a variety of options for tests you can run. In this case, select “Accessibility” and decide whether you are testing for a desktop or mobile user (the results will differ). Lighthouse will then run its automated tests, and produce both an overall “accessibility score” and list of concerns or violations to track.
Firefox has added their own Accessibility Checker, but currently the reports are very sparse and not really geared towards the non-technical user. Like Lighthouse, you can access them through the browser’s inspector.
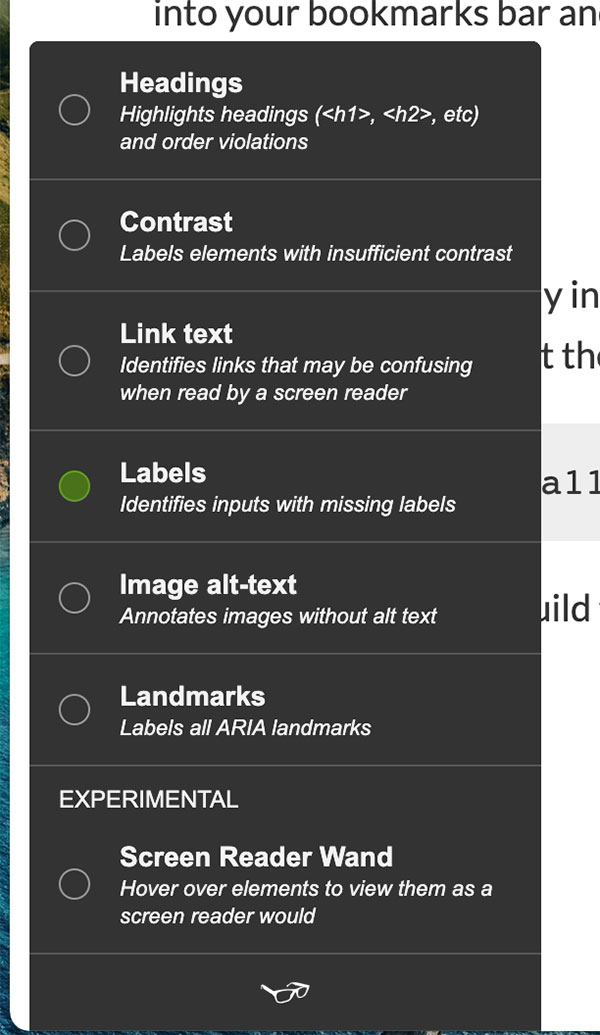
Tota11y is another free accessibility checker like WAVE and aXE. It will scan the current webpage you are reviewing, and return a list of accessibility violations. It displays in a compact interface, and while it doesn’t appear as detailed as some other options, it is a good place to get started testing.
To use, simply add the “tota11y” script to your browser’s bookmarks–it’s a bookmarklet. Once it’s in place, you just click the bookmark to load the Tota11y inspector on your current webpage. It will flag specific areas of your page where each violation takes place, and offer instructions on how to fix them.
ANDI is another bookmarklet solution. Add it to your bookmarks (favorites) in your browser, and you can run an accessibility check on a page by simply opening the ANDI bookmark. The interface is different, but like Tota11y, it will load the checker directly to the page in your browser, and guide you through any accessibility violations or warnings.
Pa11y is an accessibility testing tool more geared specifically to developers conducting ‘automated testing.’ What this means is, you install the Pa11y on your entire site, and configure a script to run tests automatically on your code prior to deploying to the server.
For those who don’t work with the command line, there’s also Koa11y, which is a free desktop application with a graphical user interface from which you can run the Pa11y accessibility tests on your site. If you prefer a more traditional, software-based solution that runs off your computer (not your browser) with a visual interface, give Koa11y a try.
Free tools are plentiful, but generally require the time and initiative to run scans on a page by page basis. For large websites, this isn’t always the most practical option. In those cases, you might want a tool that can both run sitewide accessibility tests (all pages), and do so on an automated, regularly occurring schedule. For this, there are a number of paid testing options instead.
SiteImprove is one such tool. This paid service covers a wide range of testing tools and solutions for a website, including a robust accessibility checker. Unlike some of the free options, you can configure it to run automated accessibility audits of your entire website on a regular basis. SiteImprove will conduct the tests in an experience similar to WAVE or aXE, but generate reports on your behalf and proactively send you alerts on any violations.
As a very robust tool, SiteImprove also includes testing for SEO, broken links, spelling and grammar, and other areas, making it fairly pricey for some. But if your organization can afford it, it can be a great tool and save a lot of manual labor in the long run.

Tenon is an “API-first, automated accessibility testing tool,” designed for web developers. Similar to Pa11y, developers can make Tenon as part of their site building tools. Before a change or update to the site is pushed to the server, a call is automatically sent to Tenon for accessibility testing. Developers are then informed of any errors or warnings they need to address before new code is deployed. Tenon can also be configured like SiteImprove to conduct sitewide testing and send the results to you via email.
While your web team can take care to make your website meet accessibility standards prior to launch, the website can quickly fall into accessibility violations. Why? Content editors.
So much of the accessibility to any website comes down to content. As editors add new images, links, documents and other content to the site, there’s a lot on their minds – user experience, user engagement, SEO, SEM, etc. But a seemingly small oversight, such as not including a proper <alt> tag on an image or organizing site headers out of order (H1 to H3 to H2) can trigger an accessibility violation.
These will come up later, during one of your manual or automated accessibility tests, but wouldn’t it be nice to catch them before they happen?
One technique to assist editors involves embedding accessibility testing tools directly into your CMS. These can be plugins or modules you install on your website, and/or your web team includes in your site build. Or it can be a small snippet of code that runs an accessibility check with any page edit.
There are a wide range of plugins available for this purpose, including UserWay, AudioEye, ReachDeck, MaxAccess, and accessiBe. These scripts can be run on both the frontend and backend of your website’s CMS. These aren’t free, but can be purchased for a monthly subscription. Like other automated testers we've highlighted, these will flag any violations or warnings and offer solutions for fixing accessibility issues.
Content management systems which use the popular WYSIWYG editor, CKEditor, can take advantage of its free Accessibility Checker. This provides a level of accessibility testing on any content submitted via CKEditor. Drupal users can install this via a free module. This is great for monitoring content input, but note that accessibility concerns typically go far beyond what gets input in a text editor, so additional testing is still important.
Everyone should be testing their websites for accessibility. It’s never been easier to do so, and never been clearer how important accessibility is to everyone.
This is not an all-encompassing list of every tool out there, but rather a list of some tools we’ve used that can help you get started testing.
This article is focused on automated, machine-based testing. While these can and will uncover a number of accessibility issues, it is not the only step we recommend. It’s the first step. Manual testing is also extremely important to the full picture of accessibility compliance–tasks such as navigating your site via keyboard or voice commands, or user testing by actually disabled users. These practices will uncover more than any automated testing can do.
Regardless of which option(s) you choose, remember that accessibility is a journey, not a destination. In other words, meeting accessibility guidelines requires ongoing testing. It’s never a one-time and you’re done activity. But every journey starts with that first step. So get started!
About the author

Dan Moriarty is the co-founder, CEO and chief strategist with Electric Citizen.